
Tutorial: Know how to make a clasp-free bracelet? (The strongest method)

Updated: Aug 23
The Easy DIY Myth
Everyone mistakenly believes that a clasp-free bracelet just means stringing beads onto 20 to 30 cm of standard silicone cord and tying a big knot." If it were that simple, you wouldn't be wondering why your bracelet snapped, came undone, or worse, why you lost it, right?
Why does the knot fail and make you lose your beads?
Because the cord stretches, which causes the knot to shift and loosen. It's pure logic when you think about it. As a self-taught designer, when I started in 2015,
I did exactly what you did: I looked for DIY tutorials, the best tips, and the best-kept secrets for tying an easy, strong knot that wouldn't come undone and ruin everything. I can tell you exactly why standard tutorials get it wrong. I'm going to share my Studio method for creating jewelry you'll keep for a long time, featuring a Custom drape and an invisible seal. I guarantee that this time, you'll have the real method—the safest one out there to ensure your bracelet's knot stays tied.
The Ignored Golden Rule: Millimeter Precision
The secret to "clasp-free" isn't the cord; it's the sizing. Without an extender chain, a bracelet needs to hug your wrist and be perfectly adjusted to your size. Let's dive into my archives: The initial idea was to offer chic jewelry that takes one second to put on. In the morning, I don't have time to struggle with a clasp or ask for help, so my designs are hassle-free, durable, and ready to wear instantly. Over time, this has become one of my trademarks. The materials you need are minimal:
Elastic cord Findings Beads, charms, or whatever you want to string on your cord Flat-nose pliers Wire cutters or a pair of scissors
My method and a little practice will make you a pro at tying knots that actually hold. THE SOLUTION: The whole point of a clasp-free design is that the jewelry adapts to you, not the other way around. You shouldn't have to twist your wrist trying to find the other end of the bracelet, pinning it against your body so it doesn't spin while you struggle to connect the two sides. That definitely brings back some memories, right? So, I turned to clasp-free bracelets, but that's where another problem can pop up:
Why does my bracelet cord stretch out?
Because it’s poor quality. Standard silicone cord ages badly (UV rays, salt, cosmetics, weak knots). If you want jewelry that lasts and a knot that holds, you need professional-grade cord. Otherwise, it loses its elasticity, hardens, and breaks.
This is where the disappointment comes from for people who think they can buy the cheapest jewelry (or use the cheapest materials). There’s no secret here; the same apple pie recipe made with rotten apples will be inedible. Always opt for quality findings; you will never regret it. If it breaks, it’s because YOU tied the knot wrong, not because of the material.
You need a method, and a good one—mine, or any other artisan who actually does this for a living. Now that we’re on the same page about the quality of your findings, let’s get back to the method: it’s not just about knowing how to tie a strong knot, otherwise, the answer would have been out there a long time ago. It doesn't work like that. The base I selected is a high-resistance, shape-memory technical cord that stretches up to 1.5 times its size.
There is zero risk of it breaking even if it catches on something. In case of an accident, I offer a two-year warranty on the jewelry I create because I am absolutely certain of the quality of my materials and my method.
The composition of the cord I use means it will NEVER stretch out, so your jewelry will always fit exactly like it did on day one. It’s elastic but has shape memory, meaning you can pull on it without worrying. It might stretch if it gets snagged, BUT it will always snap back to its original size, meaning the knot never shifts. That is my first secret that nobody talks about.
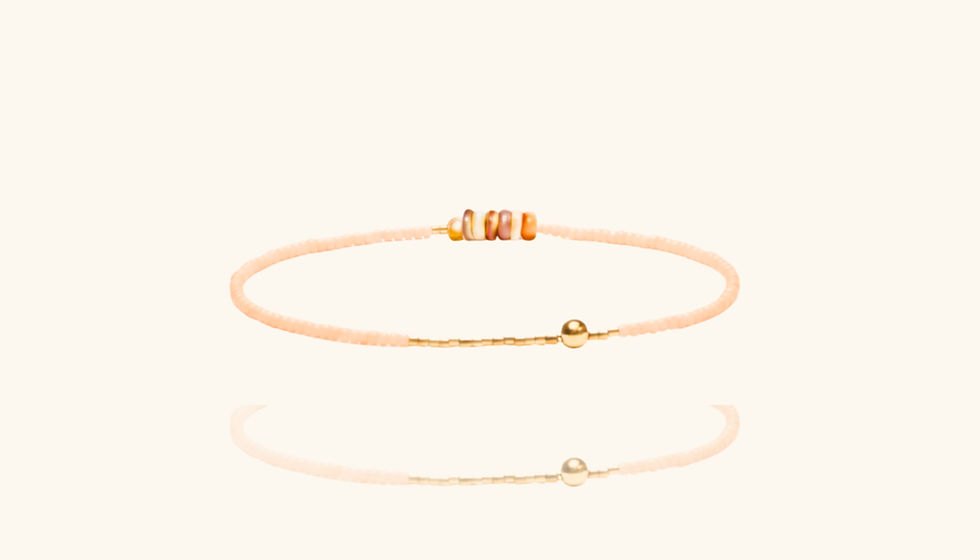
I recommend using a beading mat, which allows you to lay your beads flat in front of you without them rolling across your workspace. It makes stringing much easier and more enjoyable. It stops the beads from rolling around, so nothing shifts and nothing gets lost. Professional-grade elastic cord is flexible yet stiff enough to act as its own needle; you just hold it between your thumb and index finger and string the beads one by one.
Then, slide them down and keep going until you've strung everything. You can mix in charms or beads of different colors—this is where your creativity takes over. Place a small ruler on your beading mat so you can accurately measure how many more beads you need to string to reach your desired size (I'll explain how to know your exact size for sure further down).
Now, let's talk about the knot. We're going to skip past waxed cotton bracelets. That's what I started with, but cotton frays, and honestly, a sliding knot just isn't a very chic finish. I admit it's ultra-practical when you don't have much dexterity or many tools, but why make jewelry if you don't have either?
How do you make a clasp-free bracelet with elastic cord?
The second point I never see mentioned anywhere is that the knot itself isn't what matters. It's just another misconception floating around the web, and it's time to set the record straight. I've been creating jewelry for over 10 years, and I've never given out technical advice—I don't chase clicks. I never thought to share it because I didn't think people were looking for technical help and tips. But when I saw what so-called experts were saying about drilling shells, I decided to share my experience. It was so well-received that here I am, sharing my experience and the solutions I developed in my own studio for creating clasp-free jewelry.
Zero clasps and the trick that changes everything!
With my method, you can tie any knot and it will hold, because it's not the knot that matters—it's securing the knot. So how do you secure a knot on a bracelet, necklace, ring, or earring? Excellent question, Linda Clarini! For starters, we are going to stop the superglue massacre. A "surgeon's knot" secured with superglue or clear nail polish is pure heresy.
Look, the elastic cord you're using is flexible—that's its primary quality. The whole point of glue is to harden whatever it sticks to. So yes, your knot is locked in place, but it can no longer maintain its main feature: elasticity. Another troubling point is that the chemicals burn the elastic, creating a rock-hard breaking point, not to mention the ugly, clumpy mess. Your knot MUST remain elastic, but it shouldn't run or slip. See the difference?

Our goal is for the knot to be secured, but not hardened. Not long ago, my daughter told me, "But you know, 'they' say you should use a drop of glue." Well, 'they' can say whatever they want. I've never done things like everyone else, and I'm not going to start in 2026. Why? Because when my clients run into me at the beach, they show me their bracelets and anklets and say, "Look, it's still holding up! I've been wearing it for three years without taking it off!" I just smile and we laugh.
And wait, the exact same goes for clear nail polish—forget that nonsense. Polish chips and yellows, so it ages terribly over time. You never use polish or glue when you actually know how to make jewelry. It just isn't done; it's not a viable solution if you want jewelry that lasts. If you're looking for fast fashion, you're reading the wrong article. Go buy poorly made industrial products with cheap, weak findings that change color after three swims.
Here, as I mention in all my tutorials, I only give solid advice so you don't have to constantly buy replacement jewelry. Whether I teach you my methods or you prefer to customize pieces on my configurators, it will be durable and guaranteed for life. There's a reason for that: I bet on slow fashion a long time ago.
Let's move on to my secure, proven method. I've sold thousands of pieces that actually hold up.
Just a knot, but more than that:
3. My glue-free technique:
The "Haute Main" Seal The L|C Invention: It's all about the stopper.
I'm not going to teach you how to tie a knot, you can find that anywhere:
You pass one end under the other by crossing them, then you pass one end through the loop you formed and pull = a simple overhand knot. The easiest one.
You do the same thing, but instead of crossing the threads once, you cross them twice on the right, and then to go through the loop, you pass twice on the left with the other end and pull = a surgeon's knot. Child's play.
You could just as easily tie a double knot if you prefer: take both cords, create a loop, pass both ends through it, and pull. For people in a hurry.
Know how to make a clasp-free bracelet easily ?
My third secret is how I secure my cord cleanly and without glue. I use a finding called a "crimp bead," and yes, you guessed it, it's a bead that you crimp (crush). Hence the name, hahaha! Once you've tied whatever knot you want—it really doesn't matter—you take the two remaining ends of the elastic cord and thread them through the crimp bead.
They come in all sizes. I use the finest Miyuki beads with a hole diameter of 0.60 mm, so I use some of the finest crimp beads, between 1.1 mm and 1.5 mm, since my cord has a diameter of 0.50 mm × 2 = 1 mm.
Of course, if you're using a thicker 1 mm cord, grab a crimp bead double the size of the two cords combined that you'll be passing through the hole: 1 mm × 2 = 2 mm. The same goes for a very thick 2 mm cord, which will need a crimp bead with an opening wide enough for both ends of the cord, meaning a minimum opening of 2 mm × 2 = 4 mm.
And they come in different metals to match the metal of your jewelry: 14k gold-filled, 925 sterling silver, stainless steel, gold-plated, brass, etc. Choose the metal that fits your jewelry design line.
The trick to threading both ends of the cord into the crimp bead is to hold the first threaded cord tightly between your fingertip and nail to slightly reduce the cord's size when threading the second end into the bead. This makes passing the second end through much easier. In other words, rest the bead on your workspace and slide your first cord in. Now that the bead is threaded, you can grab it by folding your cord in half. This lets you focus purely on the hole of the crimp bead and slide the second cord in; both cords must enter the hole in the same direction. Push it down with your fingers or pliers—without squeezing it—right up to the edge of the knot.
How to Secure a Stretch Cord Bracelet?
In an upcoming video, I’ll show you the exact motion I use to thread both ends of the cord into the crimp bead—it takes a bit of practice. Once threaded, use flat-nose pliers to guide the crimp bead down until it touches the knot you tied. Do not overlap the bead onto the knot, or you risk weakening it. Like I said, the knot needs to remain free to stretch if the bracelet catches on something. You have to balance your pressure: not too tight, or you might cut the elastic cord; not too loose, or the crimp bead will slip off.
With a little practice, you'll learn how to gauge your grip on the pliers when crushing the bead, securing your cord perfectly cleanly.
The pressure you apply will vary depending on the metal used: if you're using 925 sterling silver crimp beads, they are very soft, so press lightly. On the other hand, if you're using gold-filled, the resistance is higher and you'll feel it. The same goes for stainless steel, which is even harder.
It's up to you to practice before attempting to secure your actual knot. They are inexpensive, so take the time to learn how to crimp them properly. If the placement isn't quite right, I sometimes pry open the crushed bead, remove it, and put a new one on. Try to get as close to the knot as possible without sitting on top of it. All that's left is to take your wire cutters and snip the two cords sticking out of the crimp bead you just clamped, using as much delicacy as firmness—that's the sweet spot.
Don't let the ends poke out of the bead you just crushed. I'll explain why below.
Once the knot is tied and the crimp bead is set just above it, it’s time for the finish. To me, a piece of jewelry without a proper finish is a joke; it’s what separates "Sunday DIY" from actual jewelry design.
If you've browsed the online shop and seen my work, you know I love delicate, discreet designs. When I first started, I decided to create jewelry with no clear beginning or end. I didn't want clasps or extender chains. I wanted a clean, solid closure where the knot was completely invisible. Tutorials that tell you all you need is a surgeon's knot, snip the excess cord, and you're good to go are an absolute joke... seriously... nope!
You have to tie a knot, obviously, hahaha! Whichever one you want. Personally, I do number 1: a simple overhand knot that I double. Hard to believe, right? But I swear, that’s my knot method: I keep it as simple as possible.
Secure the knot without glue or nail polish, please, so you don't stiffen a knot that needs freedom and the ability to stretch if it gets caught.
Use a crimp bead sized to your cord multiplied by 2 to stop the knot from opening and the cord from slipping out on its own. Protect the knot by wrapping your crimp bead in a knot cover (crimp cover). They aren't just sold for fun. Your knot needs to be enclosed so it doesn't bang against the other beads or anything else if you have a bare cord with sliding charms or pendants. And this is just my designer preference: leaving a visible knot is visually unacceptable. It ruins the credibility of a piece you spent time making. It would be a real shame not to give it a finish it deserves.
That is how you make a clasp-free bracelet.
Technical conclusion: No chemicals, no clumpy mess, no magic knot. Just a pure, continuous line and a secured knot that holds and is protected by its cover, making it completely invisible. This is what I call "Haute Main" (High Handcraft). It’s a thousand times better finished than standard "Sunday DIY" handmade stuff. Your jewelry deserves the best, not some shoddy workmanship. You love the piece you created or bought, so why risk losing it?
Now that we've learned how to tie a real Linda-style knot, how do you want your bracelet to fit? Loose and drooping, risking loss, or properly adjusted to your wrist size, hmm? Nope, we aren't done yet.

THE LUXURY OF WEARING CUSTOM-FIT JEWELRY, DOWN TO THE MILLIMETER.
This is what people leave out when talking about how to make clasp-free bracelets. When I started out, I wondered how to best showcase the shells I carve and crystallize, and what kind of jewelry to put them on. As I told you, I wanted clasp-free designs, but how do you handle sizing?
Without an extender chain to adjust the fit, how do I find the right bracelet size? That's when I turned to shape-memory elastic cord that stretches to 1.5 times its original size, with zero risk of it snagging and breaking.
I had figured out how to make my bracelet ultra-strong while keeping it aesthetic and easy to slip on and off in a second.
Next, I had to figure out how to ensure the piece fit perfectly. If you string beads and tie a knot at the end, you'll get something that looks like a bracelet, sure, but it won't necessarily be your size.
So, the sizes I wanted to offer beyond the standard three (S, M, and L) had to be Custom. With my vision for high-end jewelry, I wanted to deliver the absolute best. The goal: a fit adjusted to the precise millimeter.
HOW TO CREATE CUSTOM JEWELRY?
The desired effect is that none of my jewelry slides down and falls onto the hand. It's annoying on a daily basis, creates a snag hazard, and is highly unflattering—it looks like you stole it. Hence my comprehensive guide: Custom wear requires giving you the ability to know your exact finger, neck, and wrist measurements with high precision.
To measure correctly, wrap a soft tape measure or a piece of string around the widest part of your wrist. If you love the trendy "stacking" look (layering bracelets), take the measurement at the exact spot where each piece will sit.
Compare this measurement to my size chart. If you're between two sizes, always opt for the larger one. What about my anklet? The technique is the same, but I recommend adding a little bit of slack to your measurement to allow the piece to move freely. It looks much nicer.
The Easiest Method: FREE MEASURING
(With a string or a tape measure) if you don't already have a reference bracelet: Grab a soft tape measure or a simple piece of string, preferably light-colored. Wrap it around your target wrist and mark the intersection with a dark pen. Measure this length against a ruler and compare it to my size chart (under the "Circumference" column) in the sizing guide. Congratulations, you're done.
You know your size down to the millimeter, and you have all the information you need to create your bracelet:
Clasp-free With a solid knot Adjusted to the precise millimeter.
4. The Custom Alternative (#DIFM - Do It For Me)
You wanted to know how to make a clasp-free bracelett, and you learned even more:
Choosing professional-grade findings to save money
Discovering that securing the knot is actually all that matters
Tying the knot properly and protecting it with a true professional finish
Adjusting the size down to the millimeter
But finding the right technical cord and mastering this invisible seal takes hours of practice. You have to be passionate about it. If you don't want to risk making the jewelry yourself, you can design it online and I'll assemble it for you. Discover my service Make a clasp-free bracelet >, featuring millimeter-precise adjustment, lifetime Serenity Privileges, and a two-year accident repair warranty.
That is the one and only correct way to make a clasp-free bracelet that you'll wear for a long time. I am happily available via chat to answer any of your questions, and I've prepared videos to illustrate each step. The choice is yours:
Have a creative soul? Apply my Studio method at home with your own designs
Want Custom fit without the effort? Design your jewelry on the configurator, and I'll assemble it for you >


Comments