
Tutorial: How to make shell jewelry?

Updated: Aug 26
The myth of easy DIY
People mistakenly believe that to make jewelry with shells, you just have to drill them and voilà. If it were that simple, you wouldn't be asking yourself: "But how do I drill this shell without breaking it if I picked it up at the beach, or how and with what do I attach it if I bought it already drilled?" What web tutorials and other videos don't tell you, you will find here, along with what you aren't even looking for yet. To know how to make shell jewelry, you are in the right place; I am a pro designer who, in 2015, decided to turn shells into jewelry, to transform them into jewelry.
Let's try to do better than a simple surfer necklace; you don't need me for that, the web is full of DIY tutorials with cowries, heishis, etc. Or rather, I invite you to make one in a designer style.
What I wanted when I started, besides transforming holiday finds into jewelry, was to find a way to restore the shine and incredible colors that shells have when picked up at the water's edge. When shells dry, they fade. I wanted to find the technique that sublimates them when they are wet so they remain eternally shiny. And yes, I found it! I'll tell you about it below. Follow me.
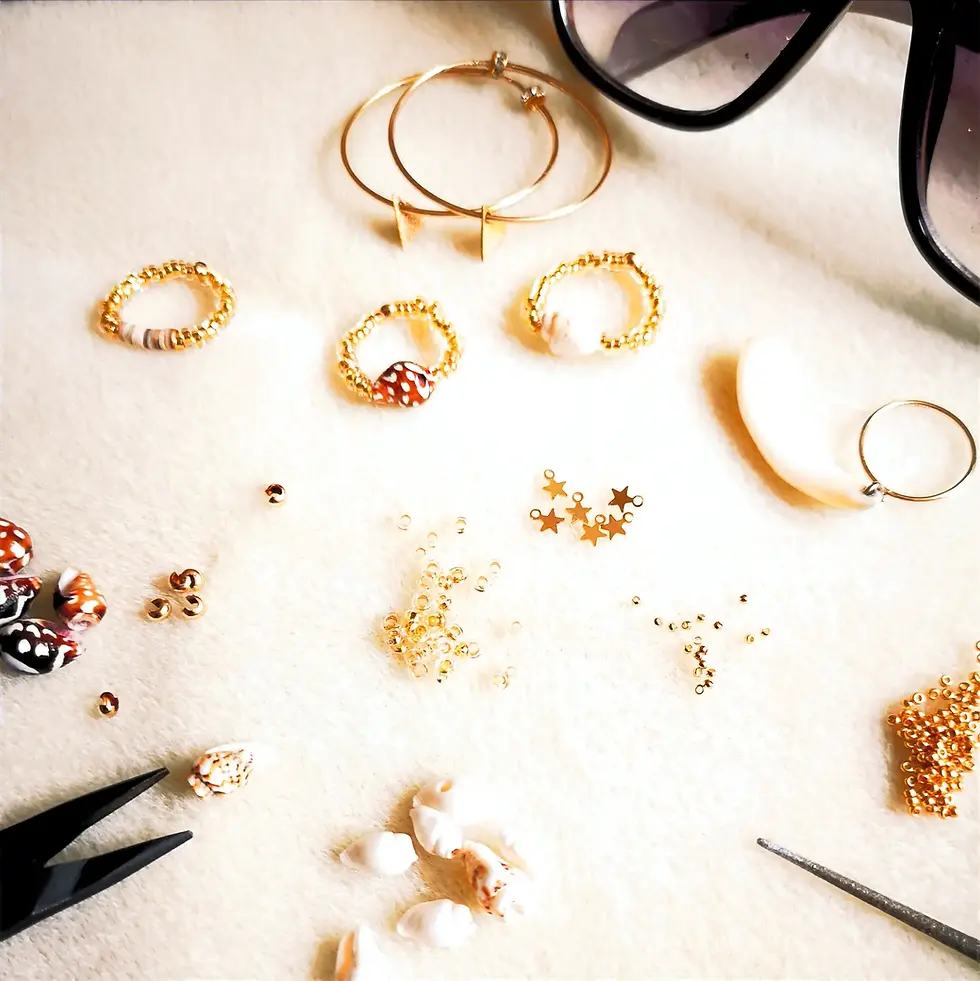
Whether you want to discover my designer techniques, know how to make a shell necklace, learn how to make a pendant with a shell, craft a shell charm to attach to a bracelet, create a ring with a shell, or even customize hoop earrings with mini shells, you first must decide how to get drilled shells.
Here are four ways to get them:
1 | I teach you how to drill them yourself #DIY
2 | You send me your shell, I drill it for you #WorkshopService
3 | You choose one of mine that you won't find anywhere else #COLLECTION
4 | You already have an idea to design your jewelry, I assemble it for you #DIFM
1 How to drill a hole in a shell?
I want to learn to drill a shell myself from A to Z: I have prepared several complete tutorials that explain step by step all the stages to drill a shell without breaking it, with my designer tips as a bonus. Which methods to ban and why, how not to break it, how to make a clean and neat hole, which tool to use, etc.
2 Who can drill a hole in my shell for me?
I prefer my shell to be drilled without the risk of breaking: in April 2026, I had the idea to launch this shell drilling service, which I used to offer at the physical workshop-boutique but had never put online.
This Workshop service is meant to be ultra-simple. You picked up a beautiful shell at the beach—whether it's a fragment or a whole shell, regardless of size, I drill all types of shells, from the thinnest to the thickest, from minis to large ones.
You want to wear it as a pendant or a charm: you send it to me with a return envelope, I drill it and mount it for you on a closed jump ring to string on a chain or a necklace/cord, or on a lobster clasp to make a magnificent charm. The findings are made of noble metals: Gold-Filled or 925 Sterling Silver. Designed to last and never oxidize.
3 How to customize a Custom-Made shell?
I want a truly unique, wild-origin shell. I specifically use the Nassarius Colombella, which is the oldest known shell to date. Hominids adorned themselves with it; it is humanity's first ornament, predating gold. White/cream and chocolate/dark brown colors with white stripes or dots. You take a step into eternity by wearing it; it's an ancestral gesture with meaning. These shells are hand-gleaned in the Coral Triangle in Asia in the Pacific Ocean by an association that the brand supports for the preservation of coral reefs.
A- Choose its setting in Gold-Filled or 925 Sterling Silver: as a pendant mounted on a closed jump ring or as a charm with its lobster clasp.
B- Select the shade of your shell from the 4 proposed: white, beige, blond, and brown.
C- Decide what shape it will have: natural shape, your initial, your lucky number, or one of my totems.
D- Finally, you have the choice between the Pure finish: the shell remains exactly as it was picked up; the Signature finish: the shell is crystallized with my Oceanic Wet-look glaze so it shines forever as if it were wet; or the Haute Main finish: the shell is hand-carved into the shape you chose and then crystallized.
4 How to create a piece of jewelry if I have the ideas but not the know-how?
I need #DIFM Do It For Me, I want a pro to do it for me: have fun creating your own jewelry on a designer jewelry configurator! In an unprecedented move, I invite you to become the designer and create your jewelry with me. You select the colors, the precious metal, the jewelry model, the finish with or without a shell, and I assemble it for you according to your idea.
For all these ideas I propose, a chat is reserved for you to ask me your questions. Feel free to ask your questions online; I will gladly answer as soon as I put my tools down. I can guide you on the configurators or help you design the jewelry of your dreams that only you will wear.
Once you know how to get a drilled shell ready to be mounted into jewelry, you need to assemble the pieces to turn your holiday souvenir into a highly sentimental piece of jewelry. If you already have it, all that's left is to attach it as a pendant by threading the closed jump ring onto one of your pieces of jewelry, for example on a (surfer) necklace.
You can also slide your shell charm onto a Gold-Filled or 925 Sterling Silver lobster clasp to start your collection of shell charms, each more unique than the last! To slide onto your bracelets, it's interchangeable and truly original.
Handmade beach jewelry - French craftsmanship
My other 2026 innovation is offering you a flexible ring inspired by my clasp-free creations.
Traditional rigid metal rings are hard and can damage your shell. So I looked for a way to hang your shell as a pendant or charm with my flexible rings that I call L|C DROPS. This prevents your shell from knocking against the ring and getting damaged. They prevent shocks and durably cushion the movements of the ring against the shell during everyday gestures.
My L|C drops serve to connect your shell strung on a necklace, a bracelet, a ring, or hoop earrings, or to be attached with a lobster clasp so you can change the style of your jewelry according to your mood or the color of the day, as you choose. They link your shell to the clasp, eliminating any risk of your charm detaching and falling to the ground; it's a closed and flexible ring.
I offer them in precious metals: Gold-Filled or 925 Sterling Silver.
Once this choice is made, you finally have the main component of your shell jewelry: your drilled shell. You can ask me to simply prepare it to be strung like a bead, just as I do for some of my bracelets (SOLO and TTOR models).
Specify this when choosing the finish (drilled, drilled + crystallized, or drilled + crystallized + carved). This way, you use it by threading it through directly, either alone or surrounded by beads and multiple charms.
Let's recap. You now have your drilled shell or one of mine ready to use:
As a charm mounted on a gold or silver L|C DROP with a lobster clasp
Or as a pendant mounted on an L|C Drop
Or as a single shell (fragment or whole) ready to be mounted
Now imagine you need to mount your magnificent shell on a ring other than the L|C DROP by using the classic jump ring I provide you. To match your charm to others you already have on your chain, for example.
Do you know how to open and close a classic open jump ring?
If yes, I still invite you to read on; you might learn something interesting. What you see on the web is not at all the right way to do it: you open the ring, you pass the ring through the jewelry, and you close the ring: child's play... nope!
If that's your "technique," you have it all wrong. Have you ever lost a piece of jewelry, a poorly attached charm? I suppose so; unfortunately, it has happened to all of us at least once. Is it the ring's fault? Not entirely. It's also the fault of the method you chose to use. That's exactly the starting point of my L|C DROP. I wanted a flexible ring to prevent tension between the shell and the ring, which, through a heavy movement or snag, would cause the ring to open. The thinner your metal ring, the greater the risk it will open, especially if it isn't closed properly.
So I created a flexible ring to absorb twisting. This prevents the ring from bending and opening, and thus prevents losing the charm. The L|C DROP bends; nothing twists or breaks. Result:
1 The shell doesn't break upon pressure or impact.
2 And the metal ring doesn't open, making it impossible to lose your shell.
You see the (genius hahaha!) idea?
So how do you properly close a jewelry jump ring?
Excellent question, Linda Clarini! I had to dive into my memories to answer this one.
You need a flat nose plier and a classic round nose plier, that's what is said everywhere. I prefer to use two flat nose pliers; they are more precise for the movement I need to give to the two ends of the ring, I find.
I started with electrician's pliers because I already had them and didn't really see the point of investing in pro jewelry pliers. Here's the diff: it's the quality and finesse. The pliers have a softer spring, so they are more pleasant to handle; it allows for more precision in the gesture because the pressure is softer, and the thinness of the tips allows for fine work. If you've looked at the creations I make, they require grasping tiny findings, so it was a necessary investment.
So for the tools:
Two pliers that will help you firmly grip the two opposite parts of your open ring.
The ring itself. To properly choose its size, count the space between the edge of the hole on your shell and the ring + at least 2 mm. This allows it to move without getting stuck if you use a rigid ring, which risks breaking it by constantly exerting tension on it. Give it some slack so it can live its life.
I specify almost everywhere that all the additional jump rings I give you with every purchase of a charm, pendant, or crafted jewelry are always in 14K Gold-Filled or 925 Sterling Silver. If you've read "Why does my jewelry tarnish and turn black?", you know why these have been the Workshop's standards since 2015.
Forget about crafting hobbies, "handmade," and DO-IT-YOURSELF workshops; your handmade jewelry deserves much better. Here you are reading my step-by-step method in a pro version, not just another tutorial that merely repeats what's already said everywhere on the internet. If I have nothing to say that you couldn't read elsewhere, my rule is to write nothing; what's the point? I don't chase clicks; I don't have the time. And I warn you, I often say the opposite of the info circulating on the web. Don't be surprised; I explain in detail why:
My goal isn't to sell you a ring, a shell, or pliers. The objective is to demonstrate the futility of most online tutorials because I did exactly what you did when I started: I looked up how to bring my ideas to life.
And clearly, it's not in any DIY tutorial; you have to go to the source, meaning to the people whose actual job it is. DIY tutorials helped me discover and determine what materials I needed, why to buy this one rather than another, and all the possibilities offered. That is undeniable.
But they didn't teach me how to create, nope!
Once again, I clarify that no one pays me to recommend this brand or that material. Giving you my pro solutions will allow you to create like a designer who partners with Marie Claire, Cosmopolitan, and Caudalie. If these internationally recognized brands contacted me—a mere "nano-designer"—there's a good reason.
Here is my atypical profile: I am self-taught. My methods and techniques are not conventional. I adapted what I saw professionals doing. No one works with shells the way I do, so I did it my way, inventing what didn't exist yet in 2015 and what I needed.
Little by little, I realized that when it comes to finishing and technique, DIY tutorials just don't cut it for creating and wearing jewelry safely and durably. And you can't sell jewelry that doesn't hold up—well, you can, but not here. I make a living from this profession I invented for myself: Ocean shaper. I don't do creative DIY. Do you grasp the difference?
I have nothing against creative arts and hobbies, except that making your own jewelry is one thing; keeping it for a long time is another. I have no room for error, and neither do you. If it's poorly made, you lose it, it breaks, oxidizes, or falls apart. That's not what we want, neither you nor me. That's what we have in common.
Here in my designer journal, I provide concrete, reasoned answers to those looking for pro answers.
If you just want to learn how to tie a knot and nothing more, there are plenty of short videos elsewhere. I don't watch them, but I see the catchy thumbnails passing by... it's really amusing hahaha! I do a little more than that (understatement).
The idea is to explain my working methods to people intrigued by my specific know-how: shaping shells—meaning crafting and glazing shells like a surfboard and then mounting them into jewelry. It's comparable to nothing else that exists on this planet.
I've checked, and I still check from time to time. I've been doing this for over 10 years without seeing a shadow of a piece of jewelry that looks like mine. So I must share my experience and reveal the daily tricks I use, to pass on which techniques allow me to crystallize shells, carve them, turn them into jewelry, and also what drives me when creating my designer jewelry.
We know about cameos created by Italian artists. There are also artisans who create domed shapes where they enclose flowers or other objects; this is decoration, but sometimes jewelry too. My concept is halfway between. I like fine jewelry, so my glaze follows the shape of the shell; there is no thickness that prevents you from feeling the shell. But I also wanted to carve them, to engrave a letter, a number, etc.
I found an "L" shaped shell once, and I thought to myself, "It would be great to find others to write a word." I couldn't find any, so I abandoned the idea. Years later, I told myself I was going to carve them, and we'll see what we see: boom, standing ovation from my circle hahaha!
Afterward, as I told you, I had this obsession with restoring their wet shine, and from there came the idea of shaping them like you shape a surfboard. You know everything about my initial idea.
Let's get back to it.
How to properly open and close an open jump ring flawlessly:
Opening a ring to slightly offset the two ends in opposite directions and then bringing them back together against each other—as I clearly say, it's an art form, even if it seems very simple at first glance.
On my articles, I publish the advice of someone who sells jewelry, not someone who sells findings. What I broadcast is my know-how. My goal is not to talk to you about the parts that make up a piece of jewelry; I manage the whole thing from start to finish.
What is said on the web is total nonsense and DOES NOT AT ALL guarantee that your ring is properly closed.
Let's be clear: the technique I'm going to explain to you, I learned thanks to a highly experienced jeweler. I offer it to you as he offered it to me. Remember this: it's not enough to simply place the two ends face to face as indicated in many DIYs's tutorials...
Yes, but no. That's wrong, because depending on the alloy, the thickness, and the quality of the ring you chose to use, there is a high risk it will open and that, unfortunately, you will lose your charm or even your jewelry. We've all been there; it's too unpleasant.
Here is the truly pro method. I'll tell you three different ways until I upload the explainer video, so you can pick the technique that seems clearest to you:
1 - When you open the ring, do so by lightly squeezing both pliers inwards.
You shift them back and forth to separate the two ends from each other
while simultaneously angling inwards,
so that the two ends of the ring overlap very slightly when viewed from above, once separated.
2 - You must ensure that the two ends cannot meet
simply with a straight movement that would bring them face to face.
We want the exact opposite of DIY tutorials; we specifically do not want the open ends to face each other easily.
3 - In other words, you separate them while executing a very slight inward twist.
One end away from you and the other towards you,
slightly diagonal. It couldn't be simpler.
You see? The trick is this: to close the ring, you will have to slide the ends against each other, and they won't be able to just meet; you'll have to force it a bit. It is this friction (or tension) that will cancel out any possible gap between the two. The two ends are pushed toward each other with this pro method.
That's his method, mine, and now yours—a gift.
It is the only way to do it in the professional jewelry field. This will be useful if one day you have a ring to solder (braze): you will slide an extremely thin solder pallion between the two sides of the ring and melt the pallion. The result is a clean solder joint that barely needs touching up, if at all. Soldering is the only way to close an open ring so it never opens again. But that's another matter; we can talk about it in another article if I ever feel like describing it at length.
By the way, I advise against soldering a ring that has passed through one of my PAMPAYAS (shell charm and pendant) with the Oceanic Wet-look, so as not to damage the glazed effect, the crystallization that I apply for the Signature and Haute Main finishes. It's not impossible, but it is very risky.
You must have:
an expert level
the right method
professional equipment
and the experience to do it very quickly
Otherwise, the heat from the torch will destroy the crystallization!
Have you read "How to make a clasp-free bracelet?" I explain there that no matter what knot you tie, that's not what counts in tying a good knot. On the web, everyone raves about the surgeon's knot... Besides being sexist by name, it is useless except to make you believe you've discovered the genius knot no one knows hahaha! No joke... If you need to tie an ultra-strong knot, I invite you to go see the one I use; I think it will surprise you. You will find the rest of this article there if you want to make a shell bracelet.

When you find such a beautiful shell, you do everything not to risk losing it, so here is my solution. Specially adapted for shells: a new type of ring.
Directly inspired by my way of making jewelry without a beginning or an end—thus with the Linda knot as I call it—I had the idea of offering you "THE L|C DROP: We got your shell" which are the new closed flexible rings I created and provide on the PAMPAYAS. I use them on all my jewelry models except those where I thread my cord inside with a bead-style assembly.
You'll find these L|C DROPS on every shell transformed into a pendant through which your jewelry will pass (rings, bracelets, earrings, and necklaces) without adding the open ring that I slip as an extra into the box if needed for a ring or hoop earrings to customize, for example.
My L|C drops are threaded through the hole of the shell during creation like a closed flexible ring that is extremely resistant. Thanks to its flexibility and elasticity, it follows your movements., it follows your movements, and in case of accidental snags, it completely eliminates shocks, unlike rigid metal rings that get stuck on your shell and can shatter it if pressed.
I specify again that the L|C DROPS are closed, just like all my clasp-free jewelry, so they don't open; that's exactly the whole point of them. You won't be able to slide anything into them unless what you want to add already has an opening. They can measure as small as 1-2 mm; I create them Custom-Made, so you just have to tell me the size you need to slip your jewelry through. If needed, they can also be created with the same black colored cord.
I invented them to protect your shell. There's nothing more annoying than damaging a beautiful object you care about because of the hardness of a simple ring. L|C DROPS are flexible and resistant, finished in 14K Gold-Filled or 925 Sterling Silver depending on the chosen metal. They respect the charm they protect.
They accompany all your PAMPAYAS; that's the name I gave to my shells mounted as charms or pendants. I hand-carve them into initials, numbers, or totems: a heart, a star, or a surfboard.
They are made of my professional high-resistance shape-memory transparent (or black) cord, which is sealed by a knot cover matching the metal you select for your jewelry assembly.
FYI, the cord I chose to use stretches up to 1.5 times its original size. Say, do you know why I'm writing this article? I saw a promoted photo/video on the web that said in the link description that you HAD TO—hahaha I almost don't dare write it, it's so weird—according to this person, you had to pre-stretch the elastic cord to prevent it from stretching too fast after making it hahaha! Now that's funny. Basically, they're telling you in advance that your cord is going to stretch out, so you stretch it before it does (?!) we agree, right? Well nope, that is exactly what must never happen, hence my choice of a high-quality, professional, shape-memory cord that does not lose its elasticity.
I will repeat it as much as necessary: your elastic cord must not stretch out permanently at the risk of your knot opening. So no, you don't pull a cord to prevent it from stretching later. Your cord must keep the exact same size whether you pull on it or it gets snagged.
Does your cord change size? Throw it in the trash; it is of poor quality and lacks flexibility; it won't be able to secure your jewelry. The durability of your jewelry depends on the quality of your findings.
Have you ever read this saying? "A chain is only as strong as its weakest link." The explanation is that the force applied to a chain is evenly distributed among its links, each bearing the same weight.
You have 2 choices: if you want security, get thick rings; if you prefer finesse, then it will be fragile. And if you know my journey, you know I only like fine things. That's why I invented "THE L|C DROP: We got your shell"; I opted for fine and solid, and I had to invent it.
Depending on the jewelry you want to hang your charm on, you will need to attach a jump ring between the L|C drop (flexible ring) and, for instance, your chain. In that case, I have just given you the best method out there to open and close a ring with the dexterity of a self-taught designer who has been doing this professionally for over 10 years.
One last reminder: I'm sharing my experience following a first, very popular article about my personal way of drilling a shell. I disagreed with a lot of things I saw floating around the web, so I threw in my two cents. People liked it, so I keep going.
If every piece of jewelry that leaves my workshop comes with a two-year parts and labor warranty in case of an accident, it's because I know the resistance of my creations. My tips are proven advice, not cookie-cutter phrases repeated over and over from tutorial to tutorial to sell you DIY supplies. I don't sell supplies; I am a pro designer of designer jewelry whose methods have proven themselves.
Want to go further? Discover the Workshop's Journal. The rest is scattered across the online workshop-boutique from page to page—I'm a talker.
If you have questions, don't stay in doubt; contact me via chat, I always answer with pleasure.
You wanted to learn how to make shell jewelry, and you learned even more:
The 4 ways to get a drilled shell (from DIY to Custom-Made #DIFM).
That closed flexible rings (my DROP L|C innovation) secure your shell by absorbing shocks.
How to open and close a classic jump ring with my pro method (and why other tutorials have it all wrong).
That choosing a professional cord and quality findings (24K Gold or Gold-Filled, 925 Sterling Silver) is the only secret you need to know to guarantee a piece of jewelry's longevity.
Whether you make it yourself or use my drilling services, I wish you a great time creating!
Official Atelier officiel - Customize a unique shell piece of jewelry shaped like a surfboard - online 27/7: hand-carved and cristallized by designer Linda Clarini Bijoux.

Comments